Welcome to Shiva's Blog...

Wednesday, November 14, 2018

Change address in your Aadhaar card free of cost online while sitting at home

Hello Friends

Welcome you All..


I Have seen people visiting Aadhaar centres wasting their precious time, just to change their Address in Aadhaar card. While few of us visit the local cyber cafe/Dealers who charge at least 100 to 200 bucks for Address Change.

But you can change your address free of cost online while sitting at home
NOTEYou must have Registered Mobile Number to update address in your Aadhaar using this update portal.

So here i am with a complete step by step process. So let's get started...

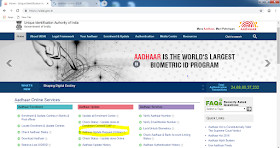
Visit https://uidai.gov.in/


Now Click On "Address Update Request (Online)"


A New page will Appear on your screen


If You have any of the below mentioned documents... Then Click on "Update Address"

Supported Proof of Address (PoA) Documents Containing Name and Address
  • Passport
  • Bank Statement/ Passbook
  • Post Office Account Statement/Passbook
  • Ration Card
  • Voter ID
  • Driving License
  • Government Photo ID cards/ service photo identity card issued by PSU
  • Electricity Bill (not older than 3 months)
  • Water bill (not older than 3 months)
  • Telephone Landline Bill (not older than 3 months)
  • Property Tax Receipt (not older than 1 year)
  • Credit Card Statement (not older than 3 months)
  • Insurance Policy
  • Signed Letter having Photo from Bank on letterhead
  • Signed Letter having Photo issued by registered Company on letterhead
  • Signed Letter having Photo issued by Recognized Educational Instruction on letterhead
  • NREGS Job Card
  • Arms License
  • Pensioner Card
  • Freedom Fighter Card
  • Kissan Passbook
  • CGHS / ECHS Card
  • Certificate of Address having photo issued by MP or MLA or Gazetted Officer or Tehsildar on letterhead
  • Certificate of Address issued by Village Panchayat head or its equivalent authority (for rural areas)
  • Income Tax Assessment Order
  • Vehicle Registration Certificate
  • Registered Sale / Lease / Rent Agreement
  • Address Card having Photo issued by Department of Posts
  • Caste and Domicile Certificate having Photo issued by State Govt.
  • Disability ID Card/handicapped medical certificate issued by the respective State/UT Governments/Administrations
  • Gas Connection Bill (not older than 3 months)
  • Passport of Spouse
  • Passport of Parents(in case of Minor)
  • Allotment letter of accomodation issued by Central/State Govt. of not more than three years old
  • Marriage Certificate issued by the Govt, containing address

After you click on "Update Address" and An Important Note will appear on your screen Explaining about the password which is a combination of your Name & Your Year of Birth. Just Close it after Reading And Click on the "Proceed Icon".


After that, Enter your Aadhaar NumberEnter the Text Verification Code (Captcha) & Click on the Send OTP Tab.


Enter the OTP Received on your "Registered Mobile Number"


Tick the Box Displayed in Front of "Have Address Proof" Text and Press submit Button..


After that Fill the Following details and Click on Submit Button..


After You Proceed, You need to upload a Scanned copy of Your Address Proof from any of the following document mentioned above "list of the supported documents already shared"


Select the Option from the drill down list, upload the document & Click Submit on the Submit Tab.


A confirmation Dialogue Box Will Appear on your Screen... Proceed and Click on YES Icon.


Select the option Karvy-KDMS and click on Submit Tab.


Congratulations... Your Request is Successfully Submitted... you can either download or print the details... You''ll Also Receive a confirmation SMS on your Registered Mobile Number.


All Done... Hope it was helpful for you... Please Comment and Share with your friends/colleagues if You find it helpful.
Share:

Friday, November 9, 2018

Online PF Transfer from Previous Employer to Current Employer (One Company to Another)

Hi Guys.. This is your friend Shiva.

The Previous blog was about PF Withdrawal, But as few us do not want to withdraw their money as the PF Savings can be used at the time when we are no longer fit to work or at retirement. And thus few of us prefer to transfer their PF from one company to another, instead of withdrawing the amount when they move to a new job.

Today i am going to share the complete PF Transfer process with you guys. So Let's get started....

Go to https://unifiedportal-mem.epfindia.gov.in/memberinterface/ And Login with your UAN Id/Number & Password.


If you don't know your UAN Number or How to Login etc... Pls click on this link, it'll help you to learn the basics..
https://shiva3936.blogspot.com/2018/06/easy-online-pf-withdrawal-process-step.html#more


2- Now, Go to the Online Services Section and Click on One Member - One EPF Transfer Account (Transfer Request)


After you click on this, A slide will open like this...


 Scroll Down and go to Select Details of Previous Account


Now, Select anyone from Previous Employer or Present Employer (Prefer the one who can respond to your queries) and Enter Your Member Id/ UAN Number and Click on Get Details...


NOTE-  Before all this, you need to update your Date Of Leaving from your last employer, Only then you'll be able to transfer your PF... Simply Mark a mail to your Previous Employer and they"ll forward it to their concern PF Team & get it done.


After you select the previous employer & click on get details, You'll be able to see the previous employer details along with your Date of Joining & Date of Leaving.


Once you see these details... Tick the box and select as shown in image below


Click on Get OTP and OTP Will be sent on your registered mobile number... Enter the OTP and Click on Submit Button.

You'll receive a confirmation msg on screen that your claim has been successfully submitted.


Congratulations... You are done with the submission part... Now it's time to track claim status..
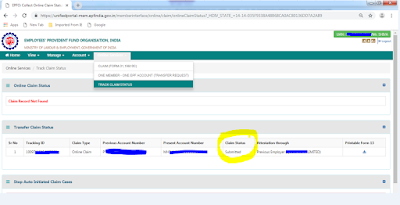
Just go to Track Claim Status Option and Here You can see your Tracking Id, Previous PF Account Number, Current PF Account Number etc details...


Click on the Small Download Icon (Showing Just Below the Printable form 13 Text)

Open the Downloaded file and you'll find the following details and your previous and current employer details...


You need to take a print out of the following pages and submit a signed copy to your previous employer.


Once It is Approved by Employer, You can see the the Claim Status Changed to "Accepted by Employer"


All Done... Hope it was helpful for you... Please Comment and Share with your friends/colleagues if You find it helpful.
Share:

Sunday, June 24, 2018

Easy Online PF Withdrawal Process Step By Step


Hi Friends..
Welcome you all...

I Saw One Of My Friend Struggling With PF Withdrawal Process, So I Tried to Share the Simplest & Easiest step by step Process to Withdraw PF Online with the help of screenshots. The PF Withdrawal Process is Actually Very Easy...

So, Let's Get Started.

The First Step is to Activate your UAN... Now, What is an UAN?
UAN is an Universal Account Number and it is given to every EPF account holder.

The Next Question You'll Ask Is that How Can I Know My UAN Number?

So Let me tell You, You Can Easily Get Your UAN Number Through Your Employer, Which is the Easiest Way to Get your UAN Number. Just Contact your Agency Spokes Person & He'll Easily Provide You Your UAN Number...

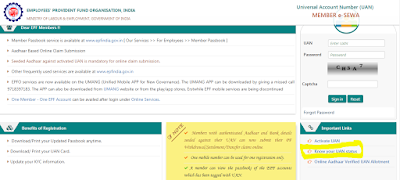
Now, what If you don't get your UAN from there for some reason.. Then you have to get if from the EPFO Portal, Just go to the https://unifiedportal-mem.epfindia.gov.in/memberinterface/

On the Right Side, and You"ll Find a link "Know Your UAN"Then Click on "Know Your Status" Tab & You'll Be Directed to a new Page..


A New Page Will Appear like this...


-You Just need to Fill the Detail Here, Select State, Office From the Drop Down List, Enter Est Id, Member id (PF Id, that is Present on your Salary Slip) & Fill All other Details like Name, DOB, Mob No Etc...Click on the Get Authorization pin tab..

Enter OTP Received on the Mobile Number You Entered, 

After Entering OTP, Click on Get UAN Tab.

Now, You'll Receive your UAN Number on your Mobile Number VIA SMS.

- The Next Step is to Activate UAN....

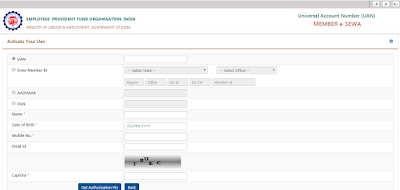
For that, Click on the ‘Activate UAN’ Tab As Shown Below..


Enter Details Like UAN Number Aadhaar..PAN...Etc... Get Authorization Pin... Click on the "I Agree' Checkbox and Enter the OTP Received...


After Successfully Activating UAN.. Enter the UAN Number and Password Received on Mobile and Reset Your Current password to the Desired One...

After that You Need to Fill Your KYC Details and Mark a mail with Screenshot to Get it Approved from Your Agency... Agency Spokes Person will then send it to the PF Team and after they approve your details, You Can Claim for PF Withdrawal.


You Need Not to Fill All The Fields.. Just Fill details of those docs Which You Have...


You Can also Check the status of your KYC Details as Shown  Below.....


After Your KYC Details are successfully Updated, You Can Claim Your PF..


You Need to Fill Both Forms ( Form 19 as Well as Form-10c )One By One... Fill the details here and You'll Receive an OTP on your Registered Mobile Number...


Once You are done with all the details... You'll Get a Acknowledgement Receipt & You'll Receive the amount in Few Days in Your Bank Account.


NOTE- If Your Total Service is Less Than 6 Months, You Won't Be Able to Fill Or Rather You are not eligible to fill The Pension Form (Form 10c)


Share:

BTemplates.com

Powered by Blogger.